As farmers we care deeply about what we grow and how we grow it. We carefully cultivate each plant to reach its prime, hoping for the best flavor and the best yield we can get. With so much to manage, sometimes one of the most important factors in a successful harvest gets overlooked: the soil.
Soil is the genesis of the life cycle of plants. It regulates water, provides nutrients, and filters pollutants. Without it, most plants could not exist. It is the very foundation beneath our feet, and it certainly can be fickle.
Soil that is too sandy won’t hold enough water for your plants and the need for irrigation will be constant. Soil that has too much silt and clay won’t drain properly, drastically shortening the life of your harvest. Given these challenges, there are some practices you can adopt to combat your soils fixed properties and optimize your harvest!
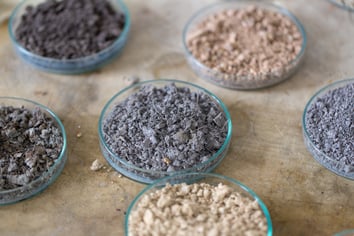
.jpg?width=294&name=shutterstock_650807923%20(2).jpg) 1. GET IT TESTED
1. GET IT TESTED
The best step you can take is the first: you won’t know how to fix your soil if you don’t know what it needs! You can either get a home testing kit or send out a sample of your soil to a local soil testing facility, but both cost about the same and if you send it out you’ll get the opinion of an expert (and free up your time to choose some of our awesome varieties that will flourish in your newly fertile soil!). Watch this video from our local university extension to learn how to take a proper soil sample![1] The best time of year to take a sample is either in fall after your harvest is done for the year or spring before you’ve put any compost or fertilizers down. Fall is typically better, considering it will give you ample time to alter your soil if something is out of balance.
2. ALTERING YOUR SOIL
When you get your results back, either from your home testing kit or from wherever you sent your sample, you can start making a plan of action. The most common issue with soil is an imbalanced PH. Most vegetables like their soil to be between 6-6.5 PH[2], though certain things like blueberries prefer a more acidic environment. Know what crops you want to grow before you try to alter your PH! This being said, extremes will be detrimental to your soil health and plant productivity. If your PH level is either too acidic or too basic, your plants won’t have access to minerals in the soil they need. Not to mention it creates a hostile environment for all of those microorganisms working hard to keep your soil healthy! Anything below 5.8 and above 7.5 is not optimal for any crops and needs to be addressed in a timely manner.
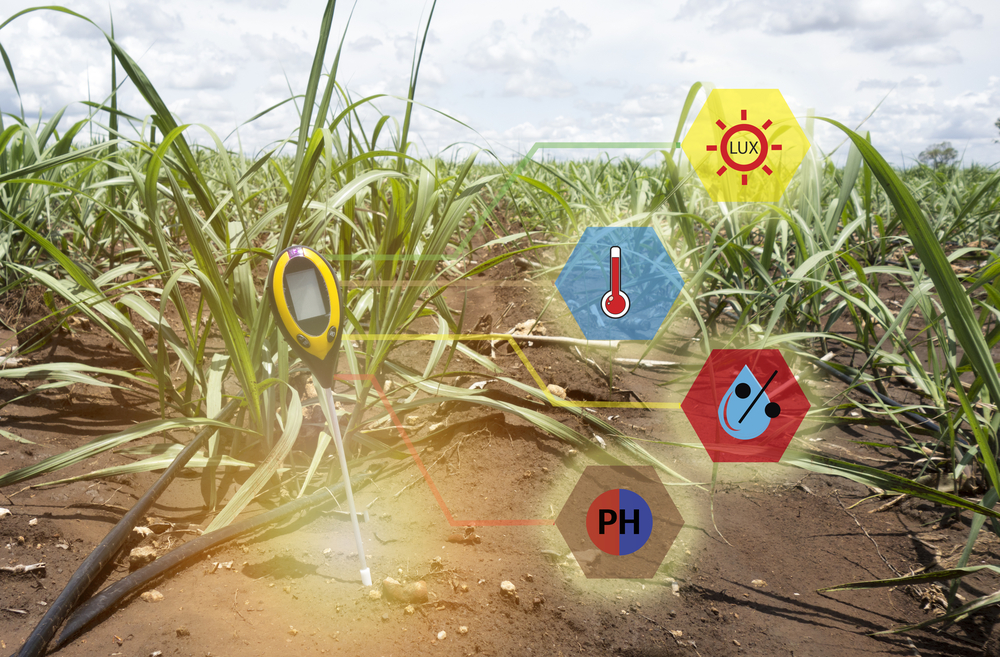
PH LEVELS, ACIDITY
PH LEVELS, BASE
If your soil is too basic, you have a few different options to alter your soil PH. As a long term investment you can add organic composted materials—such as pine needles, vegetable or fruit trimmings, and grass clippings—to your soil and over the course of a few years it should become balanced. Composting materials will also aid in drainage and generate more nutrient rich soil. If your needs are more immediate you can add distilled white vinegar to your watering regime. Using a 1:16 ratio is recommended. Be sure that you adhere to this recommendation! Concentrated white vinegar is a good weed killer, and will kill your plants if you use too much. If you have specific plants that need a more acidic environment, you can also add used coffee grounds around the base of those plants to help acidify the soil. If you need a lot of used coffee grounds, talk to some of your local coffee shops—it’s less waste for them if you take it off their hands. Everyone wins! If you want something a little more commercial and conventional, add sulfur to your soil in the same manner described above for liming agents.3 Be sure not to use powdered sulfur, as it is too fine to properly acidify soil.
There are various other deficiencies your soil might have that can mostly be fixed in the long term by composting organic materials and balancing your PH. Your soil cannot absorb minerals if it is extremely acidic or basic.2 It won’t do any good to add nitrogen or phosphorous materials to a soil that isn’t able make it accessible to your plants! Once you’ve addressed that issue, you can try some other things to balance out your soil. Another long term option is to plant cover crops during your off season to protect your soil and balance nitrogen and phosphorous stores in the soil. This being said, if you need a quick fix for your various mineral deficiencies, there are plenty of products out there that can help temporarily amend your soil.
As mentioned previously, PH isn’t the only factor to consider when it comes to soil health—your soil is an ecosystem that needs a diverse population of plants and microorganisms to thrive. Consider the following long-term practices to help ensure your soil has good drainage and diverse sources of food to support biodiversity!
3. DISTURB THE SOIL AS LITTLE AS POSSIBLE
The microbes in your soil die when largely disturbed—like when tilling—and it creates a hostile environment for any new microbes that try to move in.[4] Every time you till the soil, it breaks up the web that connects the microbes and all of their sources of food. That makes it much more difficult for the microbes to receive water and nutrients, and makes it much harder for them to survive. Ergo, the less you disturb your soil, the healthier your soil will be! You can till minimally or try the no till method. The process is the same for a 300 acre farm as it is for a 3 acre farm; it’s scale neutral and can be adapted for any size operation. The premise is to lay down a lot of organic composted material—3-4 inches of mulch or 2-3 inches of straw or grass clippings—in the spring before you plan on planting and let it rest.[5] For larger operations, one would plant cover crop thickly in the fall, no later than early to mid-October, and use a crimper to lay it down as ground cover/mulch in the spring. If using a crimper that is attached to a tractor, you can use an attachment behind the tractor to disc into the soil and plant seeds at the same time. This video by Jeff Moyer of the Rodale institute is a bit long, but very informative about the process. 5 It takes one to two years to really see results, but your soil will be much more fertile for it! 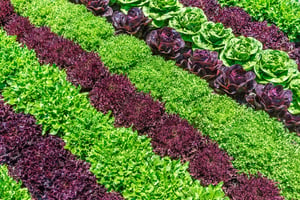 4. BIODIVERSIFY : CROP ROTATION
Different kinds of plants deplete soil differently; crops like tomatoes and corn quickly deplete soil nitrogen and phosphorous, while root vegetables and herbs very lightly deplete soil and peas and beans actually add nitrogen to the soil![6] The basic premise of crop rotation is to avoid planting similar crops in the same place time after time. Over the course of time in one spot you’d start with nitrogen adding crops like peas, followed by a crop like tomatoes that heavily depletes soil, followed by a root vegetable or herbs that only lightly take nitrogen or phosphorous from the soil, then start that cycle all over again!6 If you rotate where you put your crops, your soil will be less out of balance and your yields will be much better. It also helps manage pests and disease spreading through similar crops.
As well as that, for the health of the microbe ecosystem it’s best to have a variety of crops. Different plants supply different types of carbohydrates for microorganisms to feed on.4 More plants means a more diverse food energy chain for the microbes living in your soil, which in turn creates a more secure and more diverse food chain. If you only have one food source for your food energy chain and that crop fails, the microorganisms in your soil will experience a famine of sorts, which hurts their ability to promote your soil health.4 As a general rule of thumb, the happier the microbes in your soil are, the happier your harvest will be.
5. KEEP A LIVING ROOT THROUGHOUT THE YEAR (COVER CROP)
Another thing to consider is to leave a living root in the soil as long as possible. The area just around the root is called a rhizosphere, and it is absolutely vital for a healthy microbial system.4 It’s a concentrated area of microbial activity where peak nutrient and water cycling happen. The more roots in the ground, the more readily food and water will be available to all the microbes that keep your plants happy! If that population of microbes were to decrease dramatically, you’d have to start nearly from scratch in the spring. One way to avoid that is to use a cover crop which, like peas and beans, restore nitrogen and phosphorous to the soil! It keeps the microbes alive in your soil through non peak growing season and helps with soil erosion as well. We have plenty of restorative cover crop options for your soil on our website. Be sure to check them out!

6. KEEP IT COVERED
Keeping your soil covered through the winter keeps the moisture in the ground, protects from erosion, reduces the temperature of the soil, and provides a habitat for the members of the food energy chain that spend even a little time above ground (like earthworms).4 It even helps suppress weed growth! You can use mulch or a cover crop to keep your soil insulated and moist.
7. COMPOST/FERTILIZER
An easy way to add healthy microbes to your soil is to add compost into your farming regime! Simply lay some down in the fall under your ground cover or mulch and the microbes should incorporate it come springtime. You can also lay down your compost again two weeks before you plant for an extra burst of microbial health right before you start your growing season.
Lastly, compost tea is a wonderful option to use on your plants throughout the growing season! This product is basically what it sounds like: a liquid compost material meant to fertilize your plants. It is most readily absorbed by spraying it on the leaves, but you can spray it on the soil as well.
Follow these 7 steps and your soil will be on it’s way to microbial heaven. Good luck planting! And be sure to pop over to our website to see what varieties you’d like to plant in your newly renovated garden soil!
Citations
____________________________________________
[1] Cogger, C. [Tom Cogger]. (2010 December 10). WSU Soil: Obtaining Samples [Video File]. Retrieved from https://www.youtube.com/watch?time_continue=2&v=JgBlQViclaM
[2] McFarland, Carol R. et al (2015, September). Soil PH and Implications for Management : An Introduction. Retrieved from http://cru.cahe.wsu.edu/CEPublications/FS170E/FS170E.pdf
[3] Williamson, Joey. (2012, October). Changing the PH of Your Soil. Retrieved from http://www.clemson.edu/extension/hgic/plants/other/soils/hgic1650.html
[4] Unknown Author (Unknown) Soil Health Management USDA. Retrieved from https://www.nrcs.usda.gov/wps/portal/nrcs/main/soils/health/mgnt/
[5] [SARE Outreach]. (2014, March 17). Terminating Cover Crops for Maximum Benefits - Jeff Moyer [Video File]. Retrieved from https://www.youtube.com/watch?v=FBt1OH6ylP4
[6] ROL Staff (2017, January 17). How Crop Rotation Can Help You Manage Pests and Improve Soil Quality. Retrieved from https://www.rodalesorganiclife.com/garden/crop-rotation-how-to


